Cloud Storage

Save Data Conveniently, Offer Life Convenience

Category: Dropbox

How to Upload videos from iPhone/iPad/Android phone to DropBox?

Part 1. How to backup iPhone videos to DropBox?

There are different ways to backup videos to Dropbox. The Dropbox mobile app makes it easy to backup your iPhone videos. Once videos are uploaded, they will sync with Dropbox on your computer and all your other devices.

Here is a quick guide on how to backup iPhone videos to Dropbox

1. Download the Dropbox app first and create an account if you don’t already have one.

2. Launch the Dropbox app

3. In the Dropbox app, go to Settings > Camera Upload > On.

4. Select whether you want Dropbox to only upload videos & photos while on Wi-Fi (recommended) or while or Wi-Fi+cellular (not recommended if you have a capped data plan).

5. Tap ‘Enable’. Dropbox will ask permission to access your videos & photos. Say ‘OK’. The app will then start uploading all your Videos & photos to DropBox cloud storage.

6. It also allows you to manually upload one by one instead of uploading all at once.

7. So, if you wish to upload just some videos, manually select them and click ‘Upload’.


Part 2. How to upload videos from Android phone to DropBox?

DropBox is the premier photo backup, sync and sharing service provided by DropBox Inc. DropBox offers 2GB of free storage space, which is pretty useful for storing photos, videos and documents. You can upgrade your free 2GB account to a paid monthly subscription plan for more storage space. DropBox offers 100GB space for $9.99/month and 500GB space for $49.99/month.

There are 2 ways upload videos from Android phone to DropBox:

A: Upload videos from Android phone to DropBox via DropBox App:

1. Go to https://www.dropbox.com/ & sign in to your account. If you don’t have an account, then create one.

2. If you have ‘DropBox app’ installed on your Android phone, launch it. Or else download it from the App store.

3. Tap “DropBox app” on your Android phone.

4. Tap “Photos or videos” button from the menu.

5. Select the videos that you want to upload from photo and video gallery.

6. Tap “Upload” button to upload the selected videos to DropBox.

B) Upload videos from Android phone to DropBox via share button on your phone:

1. Go to your phone “Gallery” and select video(s) that you wish to upload.

2. Once selected, click share button and you will see a set of options to upload videos.

3. From the options, tap “DropBox” icon. Your video upload process will start.

4. The time taken to upload videos depends on your internet connection speed & the amount of videos you upload.

5. All your videos will now be uploaded to DropBox.

Part 3. How to Upload Files From Your iPad on Dropbox?

While Dropbox is a convenient application that lets you access your files from any device or computer that has Internet access, the iPad version of the Dropbox app doesn’t include the ability to automatically share your photos, videos and other files to your Dropbox account from the “Share” menu. However, you can upload files from your iPad in one of two ways: you can upload them manually to your Dropbox folders or enable automatic uploads from your iPad’s camera.

Manual Upload

Step 1. Launch the Dropbox app on your iPad, and sign in to your Dropbox account if prompted.

Step 2. Navigate to the folder on your Dropbox account to which you’d like to upload a file. If you’d like to create a new folder for your files, tap the plus sign at the top of the left column and then tap “Create Folder.” Enter the name of the folder, and tap the “Create” button to create your new folder.

Step 3. Tap the plus sign at the top of the left column, and then tap the “Upload Here” button.

Step 4. Tap all of the files you’d like to upload to your Dropbox, as you can upload multiple files at once. A blue check appears in the upper right corner of the files you’ve selected.

Step 5. Tap the “Upload” button to upload the files to your Dropbox folder.

Automatic Upload with Camera Upload

Step 1. Launch Dropbox on your iPad, and log in to your Dropbox account if prompted.

Step 2. Tap the gear in the lower right corner of the left column to visit your Dropbox settings.

Step 3. Tap the “Camera Upload” tab, and then switch the button from “Off” to “On.” Your photos and videos automatically upload to Dropbox from your iPad’s storage.

Solve can’t upload iPhone/iPad/Android phone to DropBox

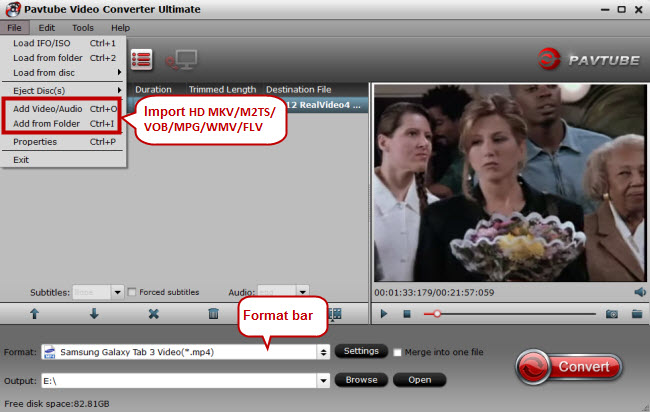
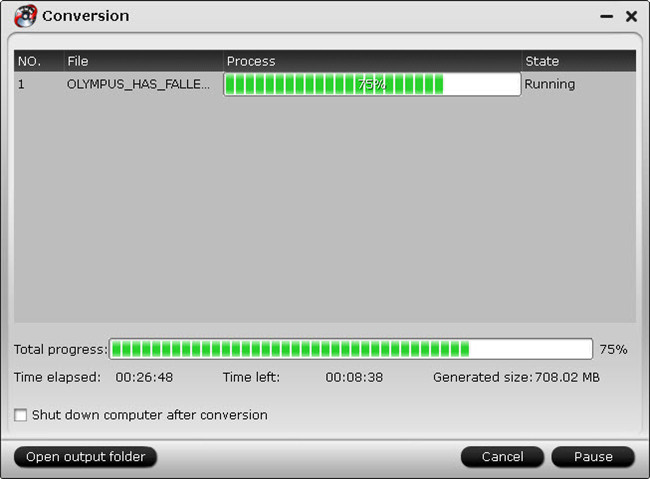
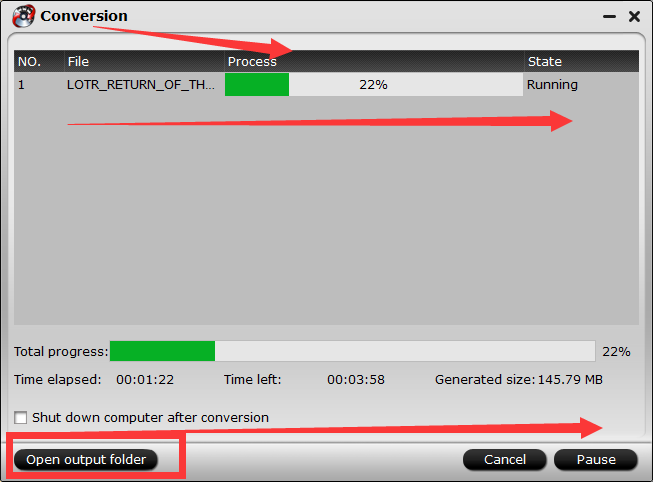
Sometimes you can’t upload the videos from iPhone/iPad/Android phone to DropBox due to the complicated formats and codecs. In order to make you have no troubles in uploading iPhone/iPad/Android phone to DropBox, you can use  Pavtube Video Converter Ultimate Macto help you convert iPhone/iPad/Android phone videos to DropBox friendly formats for smooth uploading. Besides, it also has the ability to convert DVDBlu-rayISOH.265 etc to DropBox formats with super fast speed. 

Free download and install
 

Other Download:
– Pavtube old official address: http://www.pavtube.cn/blu-ray-video-converter-ultimate/
– Cnet Download: http://download.cnet.com/Pavtube-Video-Converter-Ultimate/3000-2194_4-75938564.htm

Have more questions about Dropbox vs Google Drive, please feel free to contact us>> or leave a message at Facebook


More Topics:

How to Upload GoPro Hero 4 4K Video to DropBox?

The action camera market is expanding at blinding speed, and the best known name in this sector is GoPro. GoPro’s new Hero 4 black edition camera has the sharpest footage and is the most user-friendly version. When you got some 4K clips from GoPro, maybe you are seeking for the way to upload GoPro Hero 4K video to DropBox for enjoyment.

DropBox is a mobile document and media storage tool that allows you to sync you files online for backup. Anything like movies and music you save to your computer can be saved to your DropBox. As we all know, currently, most 4K videos are recorded in MXF/RAW/XAVC/XAVC-S format, while none of them is supported by DropBox. 

So if you have some nice GoPro Hero 4K videos and want to add to DropBox for streaming and playback on iPhone, iPod, Galaxy Tab, Kindle Fire HD and more media devices, you’d better convert GoPro Hero 4 4K video to other format like MP4, MOV or other format compatible with DropBox. To get that done, GoPro Hero 4K video to DropBox Converter is essential. Here Pavtube Video Converter Ultimate Mac  is recommended to you which can quickly convert any GoPro Hero 4 4K Video to DropBox supported videos on your computer.

Hot search: ISO to Dropbox | H.265 to Dropbox | YouTube to Dropbox 

If you are a Mac user, please turn to  Mac. Thanks to the built-in video editor, you can trim, crop and retouch your videos in clicks. Overall, no matter what versions, this program is a completely professional converter, editor and player.

Free download the top video converter for Windows:


Other Download:
– Pavtube old official address: http://www.pavtube.cn/blu-ray-video-converter-ultimate/

How to Convert GoPro Hero 4 4K Video to DropBox for uploading?

Step 1. Load 4K video

Launch the 4K to DropBox Converter; click “Add Video” button to import GoPro Hero 4 4K videos into the program. Loaded videos can be previewed in the right preview window.


Step 2. Decide on output format

Click the drop down box of “Format”, through which it is possible to select Dropbox highly compatible format like MP4, MOV from “Common Video” profile list. For those who wanna upload 4K video files to Dropbox and share on tablet or phones, you can choose a certain preset like iPad as target format.


Tip: If you need, you can also click “Settings” to modify parameters of your output profile to meet your professional needs: bit rate, frame rate, aspect ratio, etc.

Step 3. Start ripping GoPro Hero 4 4K Video to Dropbox

The final step is to tap “Start conversion” button and commence converting GoPro Hero 4 4K Video videos to Dropbox. After the conversion,you can click on “Open” button to locate the ripped videos.

How to uploaded converted GoPro Hero 4 4K video to Dropbox?

1. Sign in to the Dropbox website.

2. Click the Upload button from the very top of the window. The upload button

3. A window will appear. Click the Choose File button and then select the file on your computer that you’d like to add to your Dropbox.

4. Choose as many files as you like, and then click the Start Upload button.

5. The window will disappear, your files will start uploading, and you’ll be shown a progress indicator. That’s it, you’ve added files to your Dropbox!


Have more questions about Dropbox vs Google Drive, please feel free to contact us>> or leave a message at Facebook

More Topics:

.

Upload download YouTube to Dropbox for iPad playback

It is no wonder that YouTube as the world’s top-notch video sharing website comes to your first choice, but not everyone has the spare time to sit in front of computer to watch YouTube videos from the beginning to end. If you often use Dropbox to play videos on iPad. It’s wonderful for you to find a good way to download YouTube to Dropbox so as to watch YouTube videos later at your leisure time. Here we go!

First, convert downloaded YouTube to Dropbox:

Since there is no direct way to put YouTube to Dropbox, my suggestion is to get YouTube download to computer and then upload it to Dropbox. Anything like movies and music on the computer can be saved to the Dropbox. It can support a wide range of formats like .mp4, 3gp, .avi, .mov, wmv, .mpg, .mkv, etc. To share YouTube videos from Dropbox to iPad, what you need to do is to convert YouTube movies to Dropbox/iPad (Pro/Air/Mini) friendly format first.
Pavtube Video Converter Ultimate Mac is the bee’s knees, which can help you fast convert YouTube movies to a format playble by iPad from Dropbox while keeping the original quality. Besides, if also offers the optimal presets for iPhone, Galaxy Tab, Kindle Fire HD, Nexus and more media devices. The built-in video editor allows you to trim, crop, rotate video, add watermarks, etc. to get the very part and effect you want.

Hot Search: H.265 Video to Dropbox, ISO to Dropbox, Blu-ray to Dropbox

Free Download or Purchase Video Converter Ultimate for Mac:

       
Other Download:
– Pavtube old official address: http://www.pavtube.cn/blu-ray-video-converter-ultimate/

Convert YouTube movies to Dropbox for iPad playback

One: Download YouTube vdieos on computer and run YouTube to Dropbox converter. You can load the YouTube movies by clicking “Add video” button. The converter supports converting multiple files at a time.


Two: Click and format bar and select the appropriate format. For Dropbox, you can choose MP4 format in “Common Video” column. Or you can directly choose iPad as output format depending on your device.


Tip: Simply click Settings bar and you can tweak the settings to your satisfaction and even save it as preset. If you only have the free account of DropBox, you only have 2 GB of space. You’d better adjust the video settings to keep a balance of video size and video quality.


Three: After all necessary settings, click the “Start conversion” button to begin converting YouTube movies to Dropbox highly compatible video files. After the conversion, you can easily find the generated files in “Open” panel.

How to Drop your files in your Dropbox folder

It’s easy to add files to Dropbox. Move your files into your Dropbox by dragging and dropping them into your Dropbox folder. That’s it. The files in your Dropbox folder will automatically be synced online and to your other computers. You don’t have to do anything. You can even use the Save As… menu option in most applications to save files directly to your Dropbox folder.

Play YouTube from Dropbox for iPad

When Dropbox for iPad is installed, login and you could find all your Dropbox files on the left. Tap a YouTube video to play on the right hand side. Hit the arrow on top to enter full screen mode.

This is the real option that lets you play YouTube videos anywhere – download an offline version of the YouTube video of Dropbox to your device. To do so, tap the ‘star’ button in the top right corner when you have an internet connection. Make sure the downloading process is complete in the Favorite tab. From the Dropbox tab, you will see the offline YouTube videos with a circled star icon. Then Click it to play YouTube video offline from Dropbox. Enjoy!

More Topics:

.

How to upload bundles of movies to Dropbox with best quality

Think of the Dropbox online file storage service as a giant extra hard drive that holds any type of file you can store on it. If you upload a video to your Dropbox account, you can access that file on any computer that has an Internet connection. If you are really a film buff, sharing bundles of movies to Dropbox is the best for you to watch online movies on mobile devices. Well, how to add movies to Dropbox for playing everywhere?


There are many choices to upload movies to Dropbox. However, if you don’t have a media player that can play a Dropbox video that you’ve downloaded, you may have to do some work in advance. I mean you’ll need to convert videos to Dropbox compatible video formats first since there the Dropbox can’t support these formats natively.

Pavtube Video Converter Ultimate Mac works as an expert to convert videos to various formats like MP4, MOV, WMV, MKV, AVI, FLV etc. of course including Dropbox video formats. In addition, the converting process is too short to influence the movies watching for its fast converting speed. Not to mention the faultless video quality during converting. Besides, with the built-in video editor, you can freely trim, crop, adjust effect, add (*.ass, *.ssa, *.srt) subtitles to your source video.

If you are running on Windows PC, please turn to Video Converter Ultimate. Follow the guide below for more convenience of converting and uploading movies on Dropbox with just couple of clicks.

Hot Search: Blu-ray to Dropbox,  GoPro Hero 4 4K Video to DropBoxiPhone/iPad/Android phone to DropBoxISO to Dropbox, H.265 to Dropbox, Formats for Storing Movies

Free Download or Purchase  Video Converter Ultimate for Mac:


Other Download:
– Pavtube old official address: http://www.pavtube.cn/blu-ray-video-converter-ultimate/

How to Convert MKV/AVI/VOB to Dropbox in three simple steps

1. Add AVI, MKV, VOB files to the converter

Launch the Video Converter for Dropbox. To add .avi, .vob, .mkv videos, you can just drag video from your file folders to the list in the operating window, or head to Add button to choose the file you want to convert.


2. Set output format

Click the format icon to open the format list, and then choose H.264 MP4 as output format from “Common Video” or “HD Video” category. Note: The output format is preferably in a common format, like MP3 for audio, MPEG-4 for video. The more common format you use, the more devices you can stream to.

Tip 1: This Dropbox video converter also enables to edit the video before the conversion by trimming, cropping, changing video effect, add subtitles etc. Click “Edit selected task” button to do it.

A couple other things to keep in mind about DropBox. If you only have the free account, you only have 2 GB of space (at least initially, unless you’ve invited some friends and gotten a little more) so you may run into space limitation issues. So, you’d better trim your DVD files if necessary. Just turn to “Trim” to trim the videos to get the very part you want.

Tip 2: If you want to change the sample rate, resolution, bitrates, etc to better cater for your playing needs, you can click “Settings” option to access the setting window.

3. Start encoding your videos

Click “Start conversion” to start converting MKV/AVI/VOB to Dropbox. This program will do the rest perfectly for you! If you have done all these steps in a well-mannered way, you will surely get the video with high prints and quality, and then you can easily upload different videos of your own choice to Dropbox for enjoying.

How to load video to Dropbox

  • Switch on your Dropbox and log it in.
  • In the top menu, find “Upload” button and click it.
  • When the window appear, select the file you want to add to your Dropbox
  • After you finished the above three steps, the window will disappear and a progress indicator will shows to you.

When uploading process finishes, it means that the information is updated on your Dropbox account. Then you can access your bundles of movies from Dropbox on your mobile phone, computer and tablet.

Files that can be viewed from the website via Dropbox

Files that preview as an image:
.jpg and .jpeg, .png, .tiff and .tif, .gif, .bmp, .ai, .psd
Files that preview as a video:
.3gp, 3gpp, .3gpp2, .avi, .mov, .mp4, .wmv, .m4v, .mpg, .mkv, .mpeg, .vob, .flv, .mts, .m2t, .ts, .dv

Have more questions about Dropbox vs Google Drive, please feel free to contact us>> or leave a message at Facebook

More Topics:


Put H.265/HEVC Video to Dropbox

H.265/HECV videos becomes more and more popular for their super high definition and smaller size than the same quality H.264 video. But for Dropbox users, putting these H.265/HECV videos to Dropbox seems not to be easy cause Dropbox natively can’t support H.265 videos.

From dropbox.com, Dropbox supports to accept 3GP, AVI, MV, MP4, M4V, WMV, VOB, MPEG, etc but not includes H.265 video. So if you want to upload H.265/HEVC video to Dropbox, you have to re-encode these H.265 video to H.264 format for Dropbox.

To finish the task, you will need to have a reliable H.265 Video Converter to do the job. Among all available H.265 Video Converters in the market,Pavtube Video Converter Ultimate Mac  claims one of the top one to meet the H.265 to H.264 MP4 encoding need. Based on my testing, it works perfectly and now I’d like to share it with all of you.

First, free download Video Converter Ultimate:


Other Download:
– Pavtube old official address: http://www.pavtube.cn/blu-ray-video-converter-ultimate/

How to re-encode H.265/HEVC video to H.264 for Dropbox?

Step 1. Import H.265/HEVC video

Click the “Add video” button to import H.265/HEVC video into the application. You also can import Blu-ray, ISO image and DVD to the app to transcode for Dropbox.


Step 2. Set output format

Click on “Format” bar to select output format. Here you can choose H.264 MP4, MPEG-4 MP4, WMV, AVI, WMA, etc any one Dropbox supported format as target format on Window. Here, we choose H.264 mp4 as the target format for its wide compatibility with all kinds of devices.


Step 3. Start transcoding H.265/HEVC

Click the “Start conversion” button at the bottom right corner to start transcoding H.265/HEVC video for Dropbox. After conversion click “Open” to find the generated videos.

Upload converted H.265/HEVC video to Dropbox

1. Sign in to the Dropbox website.

2. Click the Upload button from the very top of the window. The upload button

3. A window will appear. Click the Choose File button and then select the file on your computer that you’d like to add to your Dropbox.

4. Choose as many files as you like, and then click the Start Upload button.

5. The window will disappear, your files will start uploading, and you’ll be shown a progress indicator. That’s it, you’ve added the converted ISO files to your Dropbox!

Once you’ve added converted H.265/HEVC video files to Dropbox, now you’ll make it available for viewing on other computers, Android, Apple devices anytime, anywhere just with the help of your Dropbox.

Note: When you create a link to a video in your Dropbox you will be able to watch the full video, and anyone you share the link with will be able to view the first fifteen minutes on a preview page. In order to view the full length of the shared video, recipients will need to download the file to their computer.

Have more questions about Dropbox vs Google Drive, please feel free to contact us>> or leave a message at Facebook

Related Articles:


How to Upload ISO to Dropbox?

Dropbox must take up one position in best cloud storage providers in the field. It remains a superbly implemented, cloud-based, automatic, file-synchronization service that’s ideal for accessing and sharing data from nearly anywhere. The ISO files no matter backed up from Blu-ray/DVD or download can be also stored onto Dropbox Cloud Storage for sharing.

Common Cloud Storage can support many video formats, but not includes ISO. So does Dropbox. So for uploading ISO to Dropbox, you need to turn ISO to a more compatible format, like MP4.

To convert ISO file for Dropbox, you can use iFastime Video Converter Ultimate . It not only can turn ISO to Dropbox suitable format but also works in nearly all kinds of videos like Blu-ray/DVD/4K/SD/HD and change them to MP4 for Dropbox or other formats like H.265, M3U8, MKV, AVI, MOV, M4V, etc. For saving the space of Dropbox Cloud Storage, you can adjust the video/audio parameters in profile settings window. Lower bitrate and resolution leads smaller size. Mac users can turn to Pavtube Video Converter Ultimate Mac

Hot search: H.265 to DropBoxGoPro Hero 4 4K Video to DropBoxiPhone/iPad/Android phone to DropBox


Other Download:
– Pavtube old official address: http://www.pavtube.cn/blu-ray-video-converter-ultimate/

How to transcode ISO to MP4 before attach ISO image to Dropbox?

Step 1. Import ISO video files

Click the “Add video” button to import ISO files into the application. It supports batch importing so that you can add as many video files as you wish.


Step 2. Set output format

Click on “Format” bar to select output format. Here you can choose H.264 MP4, MPEG-4 MP4, MPEG-2, FLV, MKV, WMV, MP3, FLAC, OGG, WMA, etc as target format on Window. Here, we choose H.264 mp4 as the target format for its wide compatibility with all kinds of devices.


Step 3. Start transcoding ISO file

Click the “Start conversion” button at the bottom right corner to start transcoding ISO file for Dropbox. After conversion click “Open” to find the generated videos.

Upload converted ISO to Dropbox

1.  Sign in to the Dropbox website.
2.  Click the Upload button from the very top of the window. The upload button
3.  A window will appear. Click the Choose File button and then select the file on your computer that you’d like to add to your Dropbox.
4.  Choose as many files as you like, and then click the Start Upload button.
5.  The window will disappear, your files will start uploading, and you’ll be shown a progress indicator. That’s it, you’ve added the converted ISO files to your Dropbox!

Once you’ve added converted ISO files to Dropbox, now you’ll make it available for viewing on other computers, Android, Apple devices anytime, anywhere just with the help of your Dropbox.

Have more questions about Dropbox vs Google Drive, please feel free to contact us>> or leave a message at Facebook

Related Artilces:

Add Blu-ray to Dropbox With Suitable Format

Dropbox is, as one of the top Cloud Storage, a storage document that can synchronizes your files online and across computers. Only if you have a Dropbox client portal on your computer, moblie phone and tablet that has an internet connection, you can access the stored videos, musics and photos from Dropbox whenever and wherever. So if you have a large of Blu-ray library, uploading these Blu-ray to Dropbox can save your shelf space and make Blu-ray movie organization and storage convenient. But adding Blu-ray to Dropbox for storing and sharing, it has some preparation job need to do. 

Dropbox can support many kinds of videos like 3GP, AVI, MOV, WMV, M4V, MKV, etc, but it can’t put Blu-ray disc online for lacking of Blu-ray drive. So for uploading Blu-ray to Dropbox for sharing and playing, a Blu-ray Ripper is needed to rip Blu-ray to Dropbox accepted format. 

Pavtube Video Converter Ultimate Mac is a smart Blu-ray ripper for you to rip Blu-ray to Dropbox with suitable format. This Blu-ray ripping tool can rip any encrypted Blu-ray and turn the Blu-ray movies to Dropbox in MP4, MOV, AVI, MKV, etc popular formats. For the video size limit of Dropbox site, the built-in editor also allows you to extract Blu-ray clips with the very part you want. Or, you can just choose to rip certain chapters of the Blu-ray as you like. 

Hot search: H.265 to DropBoxGoPro Hero 4 4K Video to DropBoxiPhone/iPad/Android phone to DropBox


You can free download and install  Video Converter Ultimate on Windows computer:


Other Download:
– Pavtube old official address: http://www.pavtube.cn/blu-ray-video-converter-ultimate/


How to upload Blu-ray to Dropbox with suitable format?

Step 1: Load Blu-ray movies to app

Run the Blu-ray to Dropbox software and click “Load file(s)” icon to load Blu-ray movies for converting. You can also import movies files from Blu-ray folder, ISO image files.


Step 2. Choose output format

Click “Format” and through the profile to select Dropbox highly compatible format like MP4, MOV from “Common Video” profile list. For those who wanna upload Blu-ray files to Dropbox and share on tablet or phones, you can choose a certain preset like iPad as target format. 


Tip: You can click settings button to customize the output parameters, such as resolution, bitrate, etc, you can also skip this step.

Step 3: Rip Blu-ray to Dropbox

After all settings, click “Convert” button to rip Blu-ray to Dropbox. When the process finishes, open the output folder to locate the generated file.

Upload ripped Blu-ray to Dropbox

1. Sign in to the Dropbox website.
2. Click the Upload button from the very top of the window. The upload button
3. A window will appear. Click the Choose File button and then select the file on your computer that you’d like to add to your Dropbox.
4. Choose as many files as you like, and then click the Start Upload button.
5. The window will disappear, your files will start uploading, and you’ll be shown a progress indicator. That’s it, you’ve added the converted Blu-ray files to your Dropbox!

Once you’ve added ripped Blu-ray files to Dropbox, now you’ll make it available for viewing on other computers, Android, Apple devices anytime, anywhere just with the help of your Dropbox. 

Have more questions about Dropbox vs Google Drive, please feel free to contact us>> or leave a message at Facebook

Related Articles:


© 2017 Cloud Storage

Theme by Anders NorenUp ↑