FreeNAS is a free and open-source software network-attached storage (NAS) system that supports sharing files across Windows, Max OS X and Linux-like systems. It is an excellent choice if you want to use Samba (SMB) protocol to share files. With it, you can back up your local machines and store a few video files. So if you are also seeking for a way to backup DVD to FreeNAS for viewing via Plex on TV as above thread mentioned, just keep reading to find the best solution.
It is a really fact FreeNAS doesn’t support DVD. If you have some wonderful DVD movies and want to save them to FreeNAS for streaming via Plex and playback on TV, you’d better convert DVD to format like MP4, MKV or other format compatible with FreeNAS. Pavtube Video Converter Ultimate ( Mac) a professional DVD ripper which can convert DVD movies to FreeNAS cloud server supported videos and then you can stream them via Plex for playing on TV.
More features of the best DVD to FreeNAS converter:
- Covnert DVD and Blu-ray, DVD/Blu-ray ISO to FreeNAS supported MP4 videos
- Rip DVD to FreeNAS, and WD My Cloud, Dropbox, My Cloud Mirror (Gen 2), Amazon Cloud Drive, Google Drive, iCloud, etc
- Batch convert DVD, Blu-ray, ISO to common MP4 format for various uasges
- Convert DVD to popular portable devices including iPhone 6s, iPad Pro, iPad Air 2, iPad mini 4, Samsung Galaxy TabPro S, Galaxy Tab S2, Surface Pro, etc
- Batch conversion and super fast conversion speed
- Easy-to-use DVD ripper with simple clear interface
- Regular updates provided for registered users without extra charge for lifetime


Other Download:
– Pavtube old official address: http://www.pavtube.cn/blu-ray-video-converter-ultimate/
How to Convert DVDs to FreeNAS for streaming via Plex on TV?
Step 1. Load DVD movies
Insert the DVD disc into your computer’s DVD drive and run DVD Ripper. You can click the “Load DVD” button to load the DVD files to the program. DVD ISO/IFO, VIDEO_TS folder are supported also.
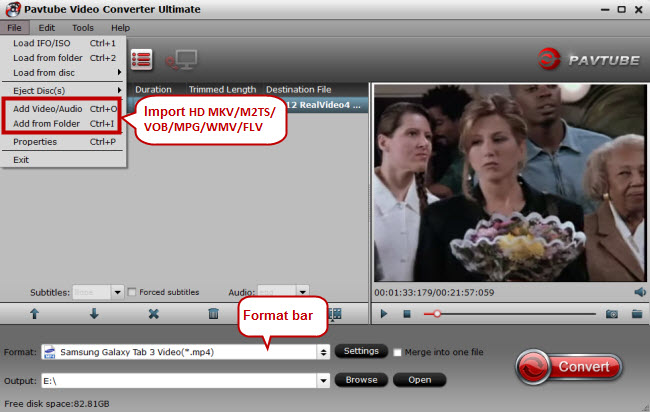
Step 2. Specify output format
Click “Format” bar, and select .mp4, .mkv from “Common video” or “HD video”, in order to make you Save DVDs to FreeNAS cloud server for streaming via Plex on TV, so here you can also select the TV format from ” TVs” .

Step 4. Start converting DVD to FreeNAS
When all these settings are ready, you can click the “Start Conversion” button to begin the DVD to FreeNAS conversion. When the ripping is done, you can click on “Open” button to locate the ripped videos, and then stream them via Plex for playing on home TV.
Tips: 5 Fun Things to Do with FreeNAS
If I asked the average user how they use FreeNAS, they’d probably answer “back up and store files”. While that’s both practical and important, it’s also a bit boring. The software is designed for small and home offices but if you’ve got a system at home, you’re probably wondering what kind of fun you can have with it.
To that end, we’ve rounded up five of the more interesting ways you can use FreeNAS. Some of the tutorials I’ll link to make the assumption you’ve already built and set up your system. If you need some help with that, check out our official FreeNAS guide to hardware design and the FreeNAS YouTube channel.
Many of these projects make extensive use of the plugins system. An overview of plugins and a full list of the ones available can be found in the FreeNAS documentation. The guides range from a simple plugin installation to some command line hacking so make sure you’re comfortable with the difficulty level before attempting any tutorial.
1. Set Up the Ultimate Entertainment Device
Media Streaming
FreeNAS is a file server by nature—in order to turn it into a media server, you’ll need to install a few plugins to allow the system to download and stream media.
There are several combinations of plugins you can install depending on the type of media you’ll be using—the most popular being Transmission (torrenting) and Plex Media Server (streaming). However, there are many other plugins that specialize in specific media types such as Firefly (music), Mylar (comic books), Sickbeard (TV shows), and CouchPotato (NZB/torrents).
If you need to stream to a DLNA device such as a PS3 or XBox One, you can install MiniDLNA by following this tutorial from joeschmuck of the FreeNAS forums.
2. Host a Personal Cloud
OwncloudWith some of the horror stories out there about privacy breaches, some people are understandably on edge about handing over their documents and photos to a third-party. Now you can set up a secure personal cloud on FreeNAS that only you and authorized users have access to. Once you get OwnCloud set up, it’s like having a personal Dropbox. The easiest way to do this is through the official plugin located in the Plugin tab.
For more control, you can also configure OwnCloud manually—there are several ways to do that. Here’s a video tutorial from DrKK of the forums for his method and the corresponding forum thread.
Here’s an alternative method from Josh Parker Ruehlig who wrote many of the FreeNAS plugins.
3. Share and Distribute Files Privately
In a similar vein, you can also use FreeNASbittorrent-sync-logo to share files and pictures with friends and family with the Bittorrent Sync plugin. It functions a bit like Dropbox but BTSync is a peer-to-peer sharing application—unlike the cloud, all the files are stored locally on each device and updated when changes are made. This is useful for sharing photos or files across several computers regardless of size. Because you’ll be downloading from many sources, it’s also vastly faster than a cloud.
Here’s our official video tutorial for setting up BTsync. It’s relatively straightforward, and it explains in step-by-step detail how to configure FreeNAS first and then set up the plugin.
4. Set up a Private Voice Chat Server
mumbleYou can configure a FreeNAS system with Mumble. If you’re not familiar with Mumble, it’s an Open Source voice over IP application that enables you to voice chat with friends over a private and secure system. There’s no limit to how many people can join a particular chat; the maximum depends on the particular server.
This particular project takes some effort to set up. This tutorial again comes courtesy of DrKK and demonstrates how to set up your own Murmur server using FreeNAS.
5. Deploy a Minecraft Server
minecraftLove Minecraft? You’ll be happy to know you can configure your FreeNAS system to host a Minecraft server. Josh Parker Ruehlig, the person responsible for the FreeNAS MineOS plugin, created a video and forum thread to demonstrate how to set it up. As he points out, the MineOS plugin gives you the advantage of being able to manage your servers via a web UI.
Prior to the plugin, you had to install Minecraft from scratch into a jail. Alternatively, you can do just that as community member Cyberjock demonstrates in this tutorial.
A Few Final Notes
First and foremost, it’s up to you to secure your system, follow best practices, and make sure your data recovery plan is adequate. None of these projects mean very much if your files are compromised or corrupted by malware.
For more project ideas, I highly recommend browsing the FreeNAS forums and signing up for an account. It’s a huge repository of great information. If you’re confused about a topic, post or do a search in the forums. Chances are you’ll find something or someone to help you.
This is just the beginning of what you can do with FreeNAS. The DIY aspect of FreeNAS means that there are literally thousands of iterations of hardware combinations and use cases. Keep in mind the FreeNAS plugin system is based on FreeBSD jails and the PBI system from PC-BSD which means advanced users can install any software they want using the FreeBSD package tools, opening up even more possibilities for your NAS.
Have more questions about Dropbox vs Google Drive, please feel free to contact us>> or leave a message at Facebook
More Topics:
- Backup DVD ISO to Google Drive for watching on mobile devices
- Read 10 Tips before choosing the best Cloud Storage
- Stream music and videos from SugarSync with iPhone and iPad
- How to Upload GoPro Hero 4 4K Video to DropBox?
- Convert and Upload AVI Movies to iCloud
- Backup Blu-ray Collection to Cloud Storage


Comments