Do you sink into the following predicament? You have over hundreds of DVD discs collection on your shelf and this enormous collection make you difficult find the exact one you want to watch on a whim. Soon, some forgotten discs are carried by dust, which have your DVD discs mountain looked dilapidated and turbid. Do you want to get out of the stuck and make your DVD movies collection well-organized? Store all your DVD in a digital compressed format. Then backup them into Synology DS214se NAS. Copying all your DVD collection to Synology DS214se NAS can make you easy to organize the amounts of movies and to select the one you would like to stream. By putting DVD movies onto Synology DS214se NAS, you can watch the DVD movie on iPhone, iPad, tablet, PS4 via Synology DS214se NAS in bedroom, living room and other places.

Although it has so many benefits of storing DVD collection on Synology DS214se NAS, how do we realize this target? Here, you have to use a third party software – DVD Ripper to eliminate DVD copy protection and change DVD to a normal and wide-compatible video format to adapt to various media streamers. Pavtube DVDAid is a good choice. This DVD Ripper can help you fast rip DVD discs to Synology DS214se NAS in a normal format like MP4, MKV, AVI, MOV, M4V…with original video quality. In addition, backing up amounts of DVD discs must cost plenty of time but DVDAid can reduce this ripping time a lot by NVIDIA CUDA technology.
Free download and install DVDAid:


Other Download:
– Pavtube old official address: http://www.pavtube.cn/dvd_ripper/
– Cnet Download: http://download.cnet.com/Pavtube-DVDAid/3000-7970_4-76158510.html
How to Backup DVD to Synology DS214se NAS for Streaming?
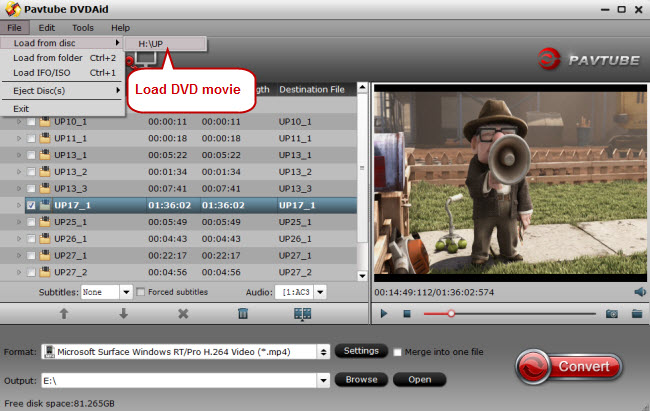
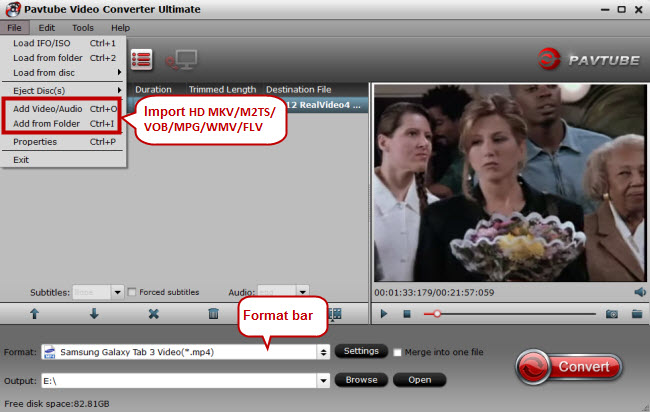
Step 1: Load DVD movie
Download and run the DVD Ripper on computer. Insert DVD into disc drive and click “Load Disc” to import the DVD file.
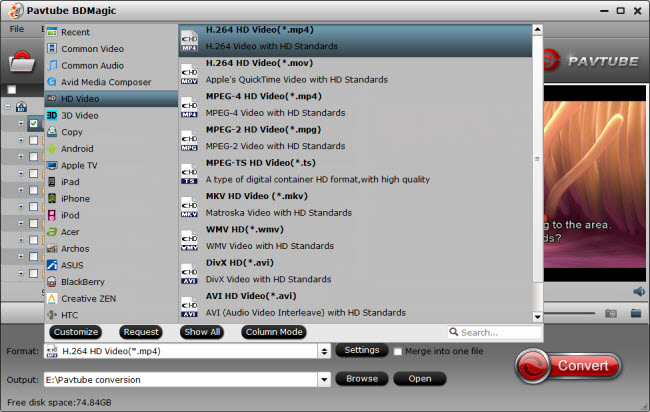
Step 2: Choose output format
Select an optimized video format for output. There are hundreds of profiles under Format menu, like AVI, MKV, H.265, etc, here we will choose HD MP4 as the output format which can be supported by general media streamers.

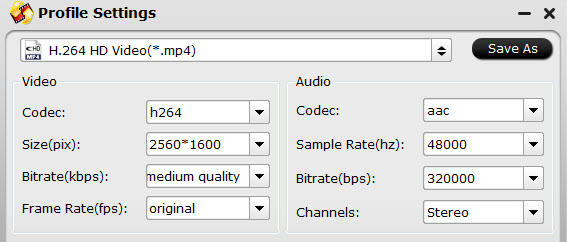
Tip: Meanwhile, profile parameters can be customized in Settings, including video codec, file size, bitrate, frame rate, audio sample rate, audio channels, etc. to get a satisfying video/audio playback via Synology DS214se NAS.
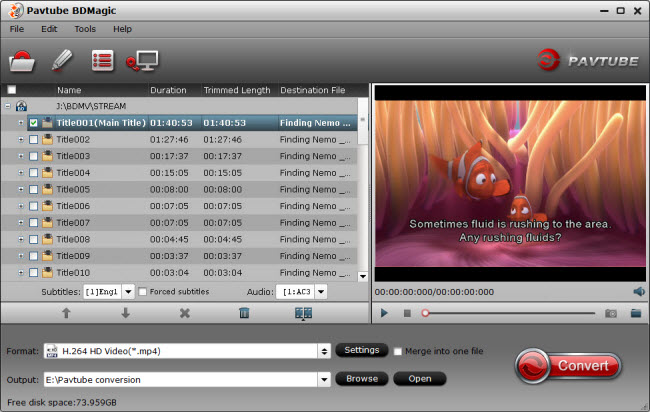
Step3: Start Conversion.
Click the big “Convert” to start converting DVD to Synology DS214se NAS. And you can locate the generated file in the output folder.
After ripped all you DVD collection to common format, then put them into Synology DS214se NAS. You can watch the DVD movies on iPad, iPhone, TV via Synology DS214se NAS conveniently.
Related Articles:


Comments