Cloud Storage

Save Data Conveniently, Offer Life Convenience

Author: Lauren Brown (page 4 of 10)

Get Only $36.76 Easter Blu-ray/DVD/Video Converter at iFastime Facebook

Easter is here, and stores are celebrating. According to the National Retail Federation’s annual Easter Spending Survey conducted by Prosper Insights and Analytics, spending for the holiday is expected to reach $17.3 billion. Those celebrating plan to spend an average of $146 per person, according to the survey. But this time, are you looking for something special? iFastime, a professional multimedia software provider who specializing in DVD, Blu-ray and video backup solutions, rolls out its Easter Special Deals 2016, offering customers 20% discounts on its hot-selling products for lifetime license. The special deals start today, and end on Apirl 4, 2016. 


2016 Easter Deals and Sales at iFastime

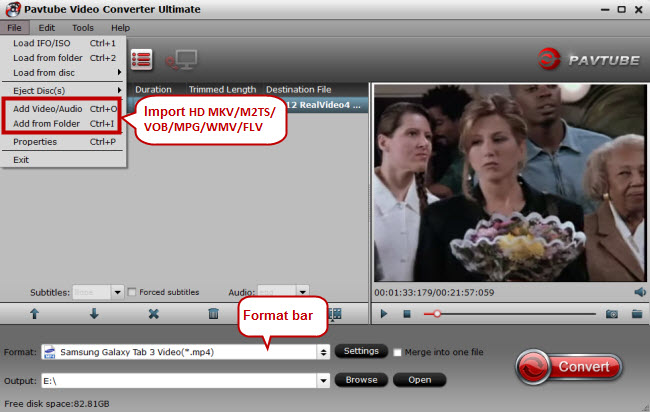
* Everyone Gets lifetime License of iFastime Video Converter Ultimate with 20% OFF: 

During the Easter time, any fan at iFastime Facebook can get iFastime Video Converter Ultimate with only$36.76. This video converter software is able to convert all the downloaded/recorded Easter movie and video files including SD/HD/4K in formats like AVI, MKV, MTS/M2TS, AVCHD, MXF, XAVC, WMV, FLV, etc into compatible formats for playback on a wide range of portable & mobile devices including tablets like old or new iPad Pro, iPad Mini 4, Galaxy Tab E, Galaxy Tab S2, Galaxy TabPro S, etc., smart phones like iPhone 6S, Galaxy Note 5, Galaxy S7, etc., game consoles like Xbox 360, Xbox One, PS3, PS4, Wii, PSP, etc. The conversion goes like blazing fast and the output video quality is genuinely astounding. 

Considering the fact that you are also granted the free updates and technical support, it still worth to grab. Don’t hesitate!

Free Download or Purchase iFastime Video Converter Ultimate:


* 20% OFF on hot-selling iFastime Video Converter Ultimate for Mac

iFastime is offering its Video Converter Ultimate for Mac at only $36.76 per license for lifetime use which means you will get an all-in-on Mac Blu-ray/DVD Ripper, Blu-ray/DVD Copy, ISO Ripper, 720p/1080p/2160p Video Converterwith saving $9.19

It is fast and easy to use, able to work with multiple formats (MP4, MKV, MOV, AVCHD – MTS, FLV, etc.) and transcode Easter Blu-ray/DVD/ISO and hot Easter movies 2016 for watching on Gear VR, Rift DK2, streaming to Plex, Roku, or editing on FCP/iMovie/Avid Media Composer/Premiere Pro, doesn’t cost much and delivers super crisp professionally looking videos without loosing quality after conversion. The interface is simple and intuitive to use which means that you can start using it within minutes of installing the program on your Mac computer. Just help yourself to make it before time runs out on the forthcoming Apirl 4, 2016!

Free Download or Purchase iFastime Video Converter Ultimate for Mac:


Participate in iFastime Easter Promotion and enjoy 20% OFF gift and surprisingly huge savings during the 2016 Easter deal! For the terms and conditions of iFastime 2016 Easter Deals, feel free to visit the official website.

Have more questions or need more coupons, please feel free to contact us>> or leave a message at Facebook.

More Topics:

Transfer ISO files to iCloud for viewing on Apple devices

Apple’s iCloud is pretty cool really. It allows you to store music, videos, apps and more and then lets you share them wirelessly between your devices. Pretty useful, right? However, as Apple is so restricted with what it will allow, it’s useful for apps and not much else as it can’t be used as a Dropbox, to lots of people’s annoyance. But now, there is a way to upload ANY file to iCloud, including images, audio, PDF’s and file directories. It’s not as simple as Dropbox and doesn’t work between iOS devices, but works between Mac’s and PC’s giving a handy way to share files between these devices. But not all video files can be uploaded onto iCloud, take ISO as an  example. So how to upload ISO images to iCloud for playing with iPhone/iPad? Check out the solution here.

To store ISO on iCloud, you may have to convert ISO to iCloud supported file formats first. To get that done, here Pavtube Video Converter Ultimate Mac is highly recommended. The program provides good quality output regardless of the end device that you are going to use. It not only can convert ISO to iCloud supported formats , but also can convert DVDBlu-ray, H.265, MKV, evev iMovie video etc to iCloud formats for smooth uploading. Besides, you can crop the black bars, add special video effects, split or merge videos, etc. as you like with the built-in editor. (http://www.ifastime.com/top-video-converters.html]read review)

Just get it and rip videos from ISO to iCloud supported videos for storing, syncing or playback without hassle.


Other Download:
– Pavtube old official address: http://www.pavtube.cn/blu-ray-video-converter-ultimate/

  • Hold ‘Control’, click the file and compress it to a .zip file
  • Change the extension of the file from .zip to .txt as before
  • Go to iCloud on your web browser, log in and go onto iWork. Upload the .txt version of the video file
  • When this has uploaded, go to iCloud on your other computer and download the .txt file. When it has downloaded, locate it in your downloads folder, rename it by removing the .txt extension and replacing it with .zip (so converting it back to a .zip file) and double click the file to open
  • You should then have your video!


Have more questions about Dropbox vs Google Drive, please feel free to contact us>> or leave a message at Facebook 。

More Topics:

Upload iMovie video to iCloud for sharing

iCloud offers much more than cloud backup and storage solutions. For instance, iCloud provides features that make photo/video sharing with your friends and family members an enjoyable experience. You may share photos/videos using your iOS device, Mac (OS X v10.9 or later and either iPhoto or Aperture), Apple TV or Windows PC (Windows 7 or later) and iCloud Control Panel 3.0 or later. For the purpose of this article, we are going to show how you can share iMovie videos on your iOS device or your Mac. Here is how:

Obviously to be able to use this feature, you need an iCloud account. If you do not have one, you may easily set up one.


How to enable this feature?

On your iOS device, simply tap Settings > iCloud > Photos and enable Photo Sharing.


On your Mac, go to Apple () menu > System Preferences then select iCloud, then click the Options… button next to either iPhone or Aperture. Then select Photo Sharing.


Note that files in iCloud Photo Sharing do not use your iCloud storage.

How to share photos and videos

To do this, you need to create a shared stream. Here is how:

On your iOS device (iPhone, iPad or iPod touch)

1. Launch the Photos app
2. Tap Shared
3. Tap Create New Stream


4. Enter a name then tap Next


5. Invite your friends (you may enter from your contacts or an email address) then tap Create


Now your shared stream has been created but it is empty. To add photos or videos, tap on the new shared stream that you just created, then tap the (+) sign to add photos or videos.


6. Select your pictures or videos to share, then tap Done

7. You now need to enter a description, then tap Post.


Now your selected files are shared with the people that you chose. Your invited friends will receive an email letting them know about your invitation to subscribe to your stream.

To change your stream settings, tap Photos > Shared > your stream, then tap People. Here you may invite more people. You may also remove previously invited people. You may enable or disable the feature which allows your friends to add photos and videos to your stream. You may also allow anyone to view your shared videos or photos on iCloud.com. If you turn this feature on, you will see the public url that you can share with people. By visiting this URL on any device and any platform (mobile, computer etc), anybody can see and download your shared stream. Your subscribers will be notified when you add more photos or videos to this stream.

photos settings

If you want to receive notifications when your friends like, comment or add photos or videos, you may also turn that on.

If you would like to delete your stream, simply tap Photos > Shared > Streams > tap the stream you want to delete > People then tap Delete Photo Stream. Note that when you delete a photo stream from one device, it will be removed from all of your devices.

On your Mac OSX using iPhoto or Aperture

You may use iPhoto or Aperture to create a shared photo stream. The steps are very similar in both software:

1. Lauch iPhoto or Aperture
2. Select a Photo/video (or photos/videos) to share
3. Click the share button

iphoto-shared-stream
4. Choose iCloud then New photo stream

5. Enter your friends emails and the name of the stream then click Ok.

iPhoto Mac Stream
Now you are sharing the selected videos/photos with your friends.

To manage this shared stream on your Mac, select iCloud in iPhoto or Aperture, then click the info button. This is where you can add/remove a subscriber or change other settings. You may allow your subscribers to add photos or vides to your stream. You may also enable or disable public URL viewing on icloud.com.

iPhoto shared stream Mac settings

To delete a shared stream on your Mac, click iCloud then select the steam that you want to remove then press Command-Delete. Again when you remove a shared stream from your Mac, it will be removed from all of your other devices as well.

Tips: How to Solve can’t upload iMovie videos to iCloud?

If you want to put iMovie videos into iCloud and sync to other iDevices, you need to check out whether the videos are iCloud compatible formats, if not, you need to convert iMovie  video to iCloud supported formats first. We offer you one professional iMovie video to iCloud converter –Pavtube Video Converter Ultimate Mac to  convert any iMovie projects like AVI, MOV, MP4 etc to iCloud formats, and hope you can smoothly upload all iMovie videos to iCloud. 

Hot search:  Blu-ray to iCloudiPhone video to iCloudMKV to iCloudAVI to iCloud


Other Download:
– Pavtube old official address: http://www.pavtube.cn/blu-ray-video-converter-ultimate/

Have more questions about Dropbox vs Google Drive, please feel free to contact us>> or leave a message at Facebook

More Topics:

Store Video_ts to My Cloud NAS for playback with Plex

You can store and protect all the Video_ts files, photos and music from your PC and Mac computer in My Cloud NAS in your home. Then you can play Video_ts anytime anywhere via Plex (Plex organizes your entire media collection with one simple interface and keeps it beautiful by adding descriptions, plot summaries, posters and album covers). It seems a little difficult to let it come true. 


Since Video_TS are actually DVD videos, to convert DVD Video_TS folder to MP4, we need to get a DVD file converter. Searching online, more than one people recommend Pavtube Video Converter Ultimate Mac  to change Video_TS format to My Cloud NAS and Plex acceptable one. 

This video app works as the best software to convert Video_TS files to My Cloud NAS and Plex friendly format MPEG-4, etc with least quality loss. Moreover, this program also comes with optimized format presets for almost all popular multimedia devices including iPhone, iPad, Android, TV, PSP, PS4, XboX etc. With it, you should be able to open, play, edit, upload the new file without any hassle. And you could get wonderful output files and never worry about out of audio/video sync. Now just get the right version and follow the steps below to encode Video_TS for adding to My Cloud NAS for playing via Plex Media Sever. 


Other Download:
– Pavtube old official address: http://www.pavtube.cn/blu-ray-video-converter-ultimate/

How to Convert Video_TS to My Cloud NAS for playback with Plex?

Step 1. Run the program and click “Load Disc” button to select and load the Video_TS folder to the program. As you can see, added files will be displayed on the left source pane and can be previewed on the right preview window. By clicking the dropdown list of “Subtitles”, you can select your preferred subtitles while viewing your Video_ts movie.


Step 2. Set right output format. Click “Format” bar, and select .mp4 from “Common video” or “HD video” to fit My Cloud NAS and Plex for storing and playing.


Tips: The default settings may not satisfy you, and you can click the “Settings” button to change the settings by yourself including video resolution, bit rate, audio sample rate, audio channel etc. for full screen playback smoothly. Or keep no changes, which is also a good choice.

Step 3. Click the “Start conversion” button on the main interface and the software will start to convert Video_TS to MP4 format immediately. When the conversion finishes, click “Open” to find the converted video files. Then you can effortless transfer the video files to My Cloud NAS for playback via Plex.

Have more questions about Dropbox vs Google Drive, please feel free to contact us>> or leave a message at Facebook

More Topics:

Play MKV movies on LG TV via 2TB WD My Book

smart LG TV is a big and nice entertainment in our daily life. Nowadays it is convenient to put movies on USB flash drive and play on a LG LED, LCD, 3D or Ultra HD 4K TV via 2TB WD My Book. Though LG TV claims to support MKV formats, somtimes we still encounter LG TV MKV playback issues. Some MKV files play nicely while others won’t play on your LG TV or MKV playback with no sound. So what’s the matter? Check out the reason and solution here.


It’s refusing to play an MKV file on LG TV because of the unsupported audio codec in the video file. For your information, an MKV is only a container. Different MKV files tends to contain different video and audio codecs. The MKV files with unsupported audio codec (i.e. MKV DTS files) certainly can’t be played on the LG TV. The solution for you is to find a third-party tool to make everything easy. 

The Pavtube Video Converter Ultimate Mac is one of the options. It’s good because you can use it as a video converter to first transcode your MKV files to LG TV supported formats and also you can use it to stream MKV files with any audio codecs to your LG TV as long as it has DLNA support. If not, it’s okay if you have a streaming device like Chromecast, Apple TV, Roku, Xbox, PS3, Plex etc. (read review)

Ok, first you need to download this program and get it installed. Then let’s see the detailed guide to use the popular MKV to LG TV converter to convert MKV files to watch on LG TV and also stream MKV files to LG TV via 2TB WD My Book. 

Free download and install


Other Download:
– Pavtube old official address: http://www.pavtube.cn/blu-ray-video-converter-ultimate/

How to Stream MKV to LG TV via 2TB WD My Book?

Step 1. Load the MKV videos to the program

Install and run the best MKV to LG TV Converter, and then import the source MKV videos to it. To do so, you can directly drag & drop the files onto the main interface, or you can click the “Add video” icon on the upper left to locate the videos from your local disk. Note that batch conversion is supported, so you can add several files to the converter at one time.


Step 2. Set LG TV output video format

Click “Format” bar and turn to “TVS” category. The program has a number of presets for Samsung/Sony/Panasonic/LG TV. Here “LG TV (*.mp4)” preset is recommended for playing on LG TV.


Step 3. Start to convert MKV videos to LG TV

When you finish the settings, you can press the big “Start conversion” button to kick off the conversion. By using future-proof technology, the conversion will be finished with ultrafast speed and the best video quality kept. After the conversion, you can then stream them via 2TB WD My Book and play your MKV videos on LG TV via 2TB WD My Book with easy.

If your TV is Samsung TV, you can learn how to play videos on Samsung TV for your smooth playback. Have a try. Wish you a nice day.


Have more questions about Dropbox vs Google Drive, please feel free to contact us>> or leave a message at Facebook

More Topics:

Store downloaded 3D MP4 on Samsung TV from My Book Live

My Book Live is a popular Personal Cloud Storage. You can connect the drive to your wireless router to provide shared storage and wireless backup for all the PC and Mac computers on your home network. It can free up space on your smartphone or tablet by uploading photos & videos directly to your My Book Live. Maybe if you have downloaded some 3D MP4 videos on your computer, want to store them to My Book Live for playing on Samsung TV? Have any troubles? Take it easy, we will provide you one solution to solve it.

We all know MP4 is a complicated format which has different codecs. In order to play downloaded 3D MP4 on Samsung TV via My Book Live without any problems, what you need is  a powerful converter that can do all this for you, you can easily get 3D MP4 converted. Pavtube Video Converter Ultimate Mac is your smart choice. It can convert 3D MP4 to Samsung TV supported MP4 formats fo your playback on Samsung TV from My Book Live.  

Besides 3D MP4 to Samsung TV, this popular Samsung TV converter also can convert DVD, Blu-ray, DVD ISO, Blu-ray ISO, VOB, FLV, MPEG/MPGAVIVideo_TS etc to Samsung TV complicated format for nice playing. Now first download the top TV converter to learn how to store downloaded 3D MP4 on Samsung TV from My Book Live.

       
Other Download:
– Pavtube old official address: http://www.pavtube.cn/blu-ray-video-converter-ultimate/

3 Steps to Convert downloaded 3D MP4 to Samsung TV from My Book Live?

Step 1. Click “Add video” button to add your downloaded 3D MP4 video files to the program. Or directly drag the video you want to convert to the left item bar. 

  
Step 2. Set right output format. Click “Format” bar, and select Samsung TV .mp4 from “TVS”. If your Samsung TV is 3D TV, here you can select the 3D side by side .mp4 from “3D Video”.


Tips: The default settings may not satisfy you, and you can click the “Settings” button to change the settings by yourself including video resolution, bit rate, audio sample rate, audio channel etc. for full screen playback smoothly. Or keep no changes, which is also a good choice.

Step 3. Click the “Start conversion” button on the main interface and the software will start to convert 3D MP4 to Samsung TV friendly video formats immediately. When the conversion done, click “Open” to find the converted video files. Then you can effortless transfer the video files to My Book Live for playing on Samsung TV.

Have more questions about Dropbox vs Google Drive, please feel free to contact us>> or leave a message at Facebook

More Topics:

Possible to play VOB on Samsung LED/LCD/3D/4K TV from WD My Cloud?

VOB files are generally from ripped DVDs, including commercial DVD movies and homemade DVDs. Besides VOB files, There are other two kind of files: IFO and BUP inside the VIDEO_TS folders which contains the features of the DVD movie. It’s a hassle to get all the way to the end only to discover that your video file won’t play VOB files on Samsung LED/LCD/3D/4K TV, for example, the following problem is from a forum:

“I have collected some VOB movies, yesterday my friend came to me and asked me to borrow some movies. He searched VOB on the internet and he said that VOB is the abbreviation of DVD Video Object. The movies saved as VOB has a very high resolution. So he wanted to watch VOB movies. When he played VOB on Samsung TV, he said that Samsung TV can’t open the VOB. He wanted to ask me how to solve this problem. To be honest, I also don’t know how to play VOB on Samsung TV. Are there someone help me? Thanks!”


In fact, most TVs does not give support to the VOB format. To fix the problem, you need to convert the VOB movies to the format supported by your Samsung TV beforehand. Here we’ll guide you through the conversion process step-by-step.

To finish the task quickly and easily,  Pavtube Video Converter Ultimate Mac is highly recommended. With it, you can convert movies from virtually any formats to your Samsung TV seamlessly without any hassle. Besides, this powerful Samsung TV converter also can convert DVD, Blu-ray, ISO, H.265, AVI, Tivo, MP4, AVI, AVCHD, etc SD/HD/4K videos to various popular Samsung LED/LCD/3D/4K TV for your freely playback.

Now download the program and follow the tips below to to convert VOB to play on your Samsung TV.


Other Download:
– Pavtube old official address: http://www.pavtube.cn/blu-ray-video-converter-ultimate/

A step-by-step guide to Convert VOB to Samsung TV via WD My Cloud

Step 1. Click “Add video” button to add your VOB video files to the program. Or directly drag the video you want to convert to the left item bar. 


Step 2. Set right output format. Click “Format” bar, and select Samsung TV .mp4 from “TVS”.


Tips: The default settings may not satisfy you, and you can click the “Settings” button to change the settings by yourself including video resolution, bit rate, audio sample rate, audio channel etc. for full screen playback smoothly. Or keep no changes, which is also a good choice.

Step 3. Click the “Start conversion” button on the main interface and the software will start to convert VOB to Samsung TV friendly video formats immediately. 

When the conversion finishes, click “Open” to find the converted video files. Then you can effortless transfer the video files to WD My Cloud for playback on Samsung TV.

Have more questions about how to store VOB on WD My Cloud for playback on Samsung LED/LCD/3D/4K TV, please feel free to contact us>> or leave a message at Facebook.

More Topics:

Upload DVD ISO files to Samsung Smart TV via 2TB My Cloud

There some problems from some forums about playing DVD ISO files on Samsung Smart TV via 2TB My Cloud:

“I have a Samsung smart tv. I also have a My cloud by western digital. I have placed both devices on my home network (Hardwired)… I then placed all my video/pictures/music on the 2TB My Cloud device. The TV picks up the device and plays it the media…But the fast forward and rewind feature is not available according to the TV. Only the Next button is available, thus I cannot stop a movie, play it and forward to the part I left off.. I have to start over again. How do I work around this?”

“Hi, I am curious as to whether or not I will be able to view the ISO pictures on 2TB My Cloud through the smart hub of my samsung tv. If it is possible could somebody please help walk my through the steps I need to take. I am not very advanced with technology and am afraid to try on my own. Thank you!”

Feel confused like these situations? You can check out this guide to learn how to put the DVD ISO movies you collected to your 2TB My Cloud for storage and streaming on Samsung Smart TV, and  then you can easily share them with your friends or family. 


There are a lot of programs on the market that let you convert a DVD ISO file. But,  Pavtube Video Converter Ultimate Mac is the best Choice, This is a powerful DVD ISO program can easily help you convert DVD ISO to 2TB My Cloud and Samsung Smart TV with super fast conversion speed and excellent image and sound quality. Besides DVD ISO, it also can convert DVD, Blu-ray, and AVI, MKV, MP4, H.265, Tivo, FLVMOV, etc to Samsung various TV. The entire covnersion speed is super fast, it is capable of accelerating the video encoding and decoding speed with the advanced NVIDIA CUDA technology and AMD Accelerated Parallel Processing (APP). Just save your precious time and energy for most important and amusing things in life.

Free download the best ISO converter:

       
Other Download:
– Pavtube old official address: http://www.pavtube.cn/blu-ray-video-converter-ultimate/


How to Put DVD ISO files on Samsung Smart TV via 2TB My Cloud?

Step 1: Add DVD ISO files to the program

Import ISO image files by dragging and dropping, or clicking “Load file(s) > Load IFO/ISO” button. As you can see, added files can be previewed on the right viewing window. You can also load 2D/3D Blu-ray, DVD Discs and videos, then adjust the video volume and take snapshots of your favorite movie scenes.


Step 2: Decide output format

Click Format bar and choose a compatible format for 2TB My Cloud/Samsung TV. “Samsung TV (*.mp4)” from “TVS” is the proper choice, which can be also streamed via 2TB My Cloud perfectly. 


Tip: Advanced Settings

With the right settings you can retain the quality of the original ISO files while also saving space. This is particularly helpful when streaming over your network, depending on your network quality. Simply click “Settings” bar and you can tweak the settings to your satisfaction and even save it as preset. 


Step 3. Start converting DVD ISO to Samsung TV/2TB My Cloud

Hit the “Start conversion” button at the bottom of the main interface to start the DVD ISO video conversion. Once the conversion is done, click “Open” to quickly find the converted movies. Now stream this MP4 video into 2TB My Cloud for watching on Samsung Smart TV freely.  

More Topics:

Store Music Online with Amazon Cloud Drive

Last week Amazon set their sights on the mobile app market, launching their Appstore for Android. This week they’re attacking Android devices once again, but that’s not all—they’re getting into the online storage biz.

On Monday, they launched Amazon Cloud Drive and Amazon Cloud Player. Cloud Drive is an online storage space that lets you upload and store all of your digital files in one convenient place on the web. We’re talking music, pictures, videos, documents—if it’s digital, it can be stored on their servers.

But this isn’t anything new—other companies have their own versions of online storage. Apple gives MobileMe paid subscribers 20GB worth on iDisk. Microsoft provides 25GB of free storage with SkyDrive. And you get 2GB free with Dropbox, though you can opt for larger space for a monthly price. But if you’re a frequenter of Amazon, the Cloud Drive could suit you better, which provides you with 5GB free. You can also upgrade for free to 20GB of storage space once you’ve purchase an MP3 album.


Cloud Drive works with both Mac and PC, and the photos, videos and documents you store online will open up in their respective programs on your computer. The music files, in either MP3 or AAC format, can play via their web-based, streaming Cloud Player. It has basic play controls as well as playlist functionality. And with their digital music store app, Amazon MP3, Android device owners can stream their stored music directly on their phones or tablets.

Part 1. How to Store Music Online with Amazon Cloud Drive and Stream via Cloud Player?

To get started, check out Amazon’s walkthrough video to see how it works. Click on the video to begin playback

Step 1. Get Started

Just go to Amazon Cloud Drive to get set up. Click on the Get Started button, sign in to your Amazon account, and agree to the Cloud Drive terms of service. And that’s it! You now have 5GB of free online storage space.

Step 2. Upload Docs

Now that you have your account, you can start uploading your documents, images, vids, etc. Simply click on the Upload Files button and follow the directions. It’s intuitive and no different than any other online upload system, so you shouldn’t have any problems.

Tip:

Large files will take longer to upload, but uploading a 70MB MP3 album shouldn’t take more than 5 minutes with a decent Internet connection.

Step 3. Start Steaming Music

Now that you have some music loaded, simply navigate to your music folder in Cloud Drive and click on the song you want to play. The Could Player should automatically open in a new window. You may have to agree to another set of terms of service before you can gain access to the player.

As your songs continue to upload, they will automatically populate into the Cloud Player. Use the controls in the bottom left to play, skip, pause, etc.

Step 4. Upgrade to 20GB for Free

Now, if you want to bypass the $20/year price for 20GB, just purchase an MP3 album from Amazon and you’ll automatically get it for free. What’s better? Paying $20 then buying an album, or just buying an album for less than $10? You save money and get something for your music library.

From the Cloud Player, click on the MP3 Store logo in the top right (or just click here). Search for an album you want and purchase, then click the Save it to your Amazon Cloud Drive button to transfer directly to Cloud Drive and Cloud Player.

Step 5. Stream on Android Devices

So far, it’s been a cinch. And if you own an Android device, streaming your stored music to your smartphone or tablet is just as easy. Just download the free Amazon MP3 app from the Amazon Appstore for Android or the Android Market.

Part 2. How to Solve can’t Store Music Online with Amazon Cloud Drive?


As you know, music has different audios. Sometimes music is not supported by Amazon Cloud Drive. So in order to make you store Music Online with Amazon Cloud Drive smoothly, you’d better convert music to Amazon Cloud Drive supported music like MP3 for personal usages and then stream via Cloud Player without any problems. With  Pavtube Video Converter Ultimate Mac, you can easily convert your music to Amazon Cloud Drive more friendly MP3 for nice storing.

This program also lets you customize the media output setting including the audio channels. Besides, it supports extracting audios from Blu-ray, DVD and movies to WMA, AAC, MP3, WAV, M4A, AC3, RA, AU, etc. for enjoying on music players. What’s more, it also can let you convert any movies including ISOBlu-ray, DVD, AVI/MP4/H.265/MKV etc to Amazon Cloud Drive 


 Other Download:
– Pavtube old official address: http://www.pavtube.cn/blu-ray-video-converter-ultimate/

Have more questions about Dropbox vs Google Drive, please feel free to contact us>> or leave a message at Facebook

More Topics:

Backup Valentine Movies on WD My Cloud EX2 Personal Cloud Server

Make no mistake; although the EX2 is a good solution with easy management for any individual or family with high storage capacity needs, WD built in a host of tools aimed at small business users too. You can use the EX2 as a simple backup option, but it also comes packing quite a bit of advanced software and capabilities. Maybe you have some Valentine movies at hand, actually you can add them to WD My Cloud EX2 Personal Cloud Server for your personal usages. But some Valentine movies are not put onto WD My Cloud EX2 Personal Cloud Server well, such as DVD, Blu-ray, or AVI, H.265, MKV, etc. 


So in order to make you backup Valentine movies onto WD My Cloud EX2 Personal Cloud Server without any problems, you can convert the Valentine movies to WD My Cloud EX2 Personal Cloud Server more friendly MP4 format for your usages with Pavtube Video Converter Ultimate Mac).

This popular video converter can convert any Valentine movies like DVD, Blu-ray, AVI, Tivo, MXF, H.265, MKV, etc to WD My Cloud EX2 Personal Cloud Server supported MP4 videos on your computer with super fast speed. Besides WD My Cloud, it also can convert any Valentine Movies to portable device like iPad Pro, iPad mini 4, Galaxy TabPro S, Galaxy Tab S2, Apple TV, Surface Pro 4, and more.

Hot search: 4K H.265 to Microsoft OneDrive | DVD to Skydrive | AVI to iCloud | DVD ISO to Google Drive

 Other Download:
– Pavtube old official address: http://www.pavtube.cn/blu-ray-video-converter-ultimate/


How to Backup Valentine Movies on WD My Cloud EX2 Personal Cloud Server?

Step 1. Click “Add video” button to add your Valentine movie files to the program. Or directly drag the Valentine video you want to convert to the left item bar. 


Step 2. Click “Format” bar, and select .mp4 from “Common video” or “HD video” to fit WD My Cloud EX2 Personal Cloud Server.


Step 3. Click the “Start conversion” button on the main interface and the software will start to convert Valentine movies to WD My Cloud EX2 Personal Cloud Server friendly video formats immediately. When the conversion finishes, click “Open” to find the converted video files. Then you can effortless transfer the video files to WD My Cloud EX2 Personal Cloud Server without any problems.

Have more questions about Dropbox vs Google Drive, please feel free to contact us>> or leave a message at Facebook

More Topics:

.

Older posts Newer posts

© 2017 Cloud Storage

Theme by Anders NorenUp ↑