Speaking of top cloud storage providers, Amazon must take up one position. Amazon Cloud Drive is rough around the edges but definitely has potential. It provides cost-efficient plans, widespread file support and a built-in music player. If you have media files, like ISO images, how to upload these ISO files to Amazon Cloud Drive?
How to get started with attaching ISO to Amazon Cloud Drive?
To get you started with the Amazon Cloud Drive application, here is a step-by-step guide:
Step 1: Download the app and install it.
Download PC/Mac version on your computer. On PCs, it places a small cloud icon in the system tray in the lower-right corner. On Macs, the cloud icon appears in the menu bar at the top of your display.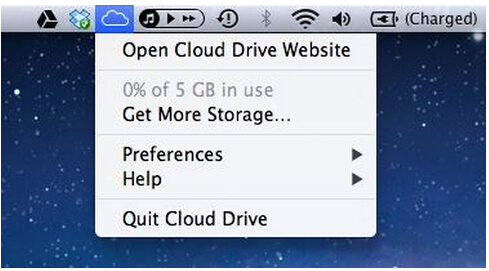
Step 2: Log in to your Amazon account.
After installing the app, a log-in window appears; you need an Amazon account to use Cloud Drive.
Step 3: Let the uploading begin.
You can simply drag a file, a folder, or multiple files or folders to the cloud icon to upload them to your Amazon Cloud Drive. Or, right-click on a file or folder to upload it. On Macs, choose the “Upload to Cloud Drive” menu option. On PCs, choose Send to > Amazon Cloud Drive.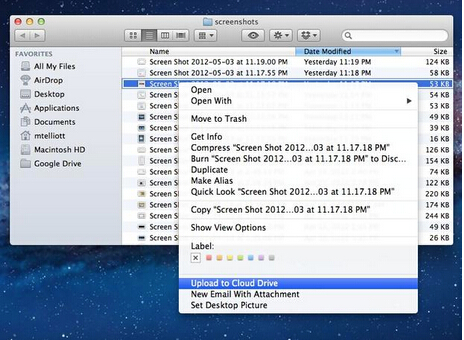
The steps are easy just like other cloud storage application method.
Suggestion: Before putting ISO images and other formats with low frequency of usage, you’d better transform them to a common format, that the multimedia players you often use can support them.
How to transcode ISO to a popular format before attach these ISO image to Amazon Cloud Storage?
To convert ISO file for Amazon Cloud Storage, you can use Pavtube Video Converter Ultimate . It can work in nearly all kinds of videos like Blu-ray/DVD/4K/SD/HD and change them to H.265, MP4, M3U8, MKV, AVI, MOV, M4V, etc. For saving the space of cloud storage, you can adjust the video/audio parameters in profile settings window. Lower bitrate and resolution leads smaller size. Mac users can turn to ( Mac).
You can simply download and install Windows version at below:


Other Download:
– Pavtube old official address: http://www.pavtube.cn/blu-ray-video-converter-ultimate/
Step 1. Import ISO video files
Click the “Add video” button to import ISO files into the application. It supports batch importing so that you can add as many video files as you wish.

Step 2. Set output format
Click on “Format” bar to select output format. Here you can choose H.264 MP4, MPEG-4 MP4, MPEG-2, FLV, MKV, WMV, MP3, FLAC, OGG, WMA, etc as target format on Window. Here, we choose H.264 mp4 as the target format for its wide compatibility with all kinds of devices.

Step 3. Start transcoding ISO file
Click the “Star conversion” button at the bottom right corner to start transcoding ISO file for Amazon Cloud Storage. After conversion click “Open” to find the generated videos.
With ISO conversion process, you can watch them on you various portable devices or media players via Amazon Cloud Storage. So just try the video conversion operation before putting ISO to Amazon Cloud Drive for your better entertainment.
Have more questions about Dropbox vs Google Drive, please feel free to contact us>> or leave a message at Facebook


September 30, 2015 at 8:41 am
Works Fine For Me! It works just fine. I like that I am able to choose which chapters, scenes I want to rip. It’s pretty simple to run.
October 2, 2015 at 2:11 am
Saved as a favorite, І like your web site!